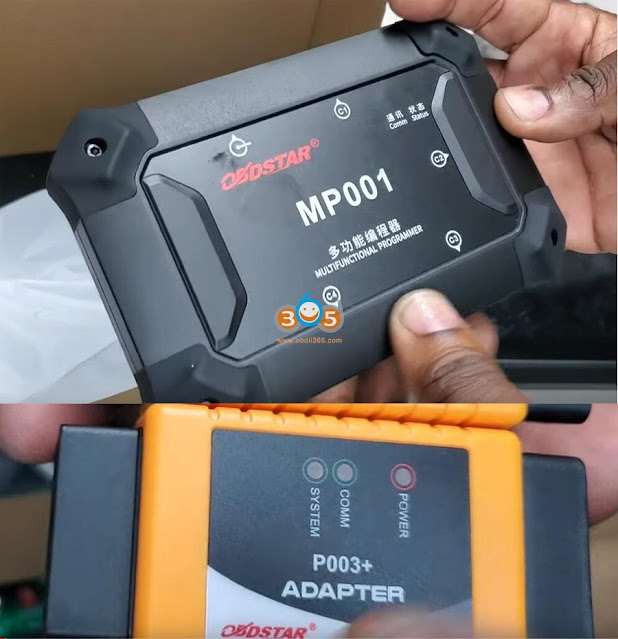
OBDSTAR MP001 is a kit specifically for DC706 programmer. What the MP001 does is pretty much what the P003 adapter does. It gives you more range to be able to connect to different PCMs. The standard breakout cable that comes with the DC706 you can connect and clone many different ECMs. but some ecms require a certain amount of input ports or output ports that you need to connect to be able to access them. There are certain PCMs for example you need to get to their boot mode to be able to access them.
The standard cable does not have those connections so that’s what the P003 adapter.
Here is an example of cloning GM MED9.6.1 ECU using DC706.
What’s needed:
Go to ECU Flasher in the main program
Select ECM for cars
DC706 has a built-in Bosch ECU database. So go to Query Bosch Number.
The query function requires network connection. Connect network.
Input Bosch number, i.e 0261S02773 then it will tell you the correct Bosch type. The chipset here is MED9.6.1.
Let’s go over brands. Select Chevrolet and search MED9.6.1
DC706 brings up two of them.
You can click on them and see which one is the correct
The first one we see is an E77 ECM, the second one shows it is an E69 ECM. The second one is what we need.
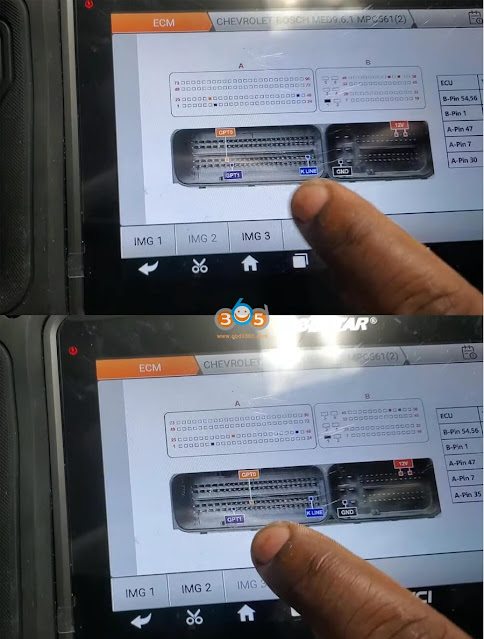
Check wiring diagram of MED9.6.1 MPC561(2)
There are two pinouts which means there are two variations of this ECM.
We don’t know which one is ours so just going to try the first one because you can see the GPT1 and GPT0 connect on 1st pinout.
Read the cloning instructions and connection diagram of MP001 and P003+ adapter
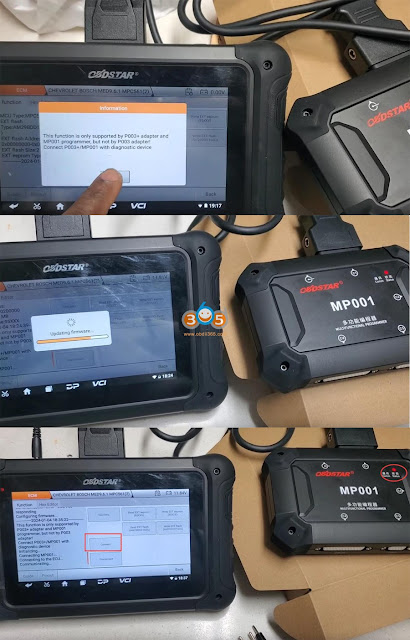
This function is only supported by P003+ adapter and MP001 Programmer.
Then we connect DC706, MP001, P003+ with E69 ECM as image below.
If DC706 says connecting MP001 and configuring firmware, but actually it never configures firmware. OBDSTAR released a patch to fix this issue and it worked finally.
Go ahead and do Connect.
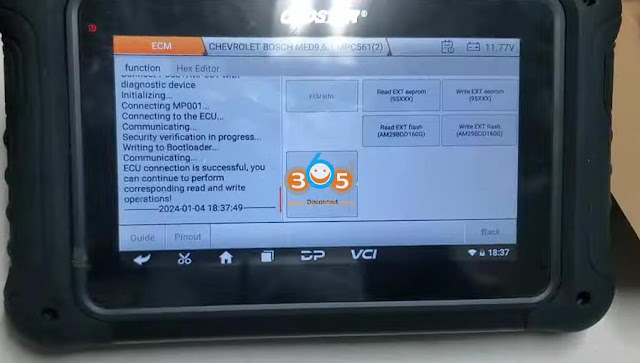
We got everything hooked up. Now it is connecting with MP001. The indicator on the MP001 turns on.
It is now available to go ahead. We can read and write from the E69 ECM.
Read and save EXT eeprom
Read and back up EXT flash
It takes longer time to read EXT flash.
Go to Hexeditor, that will be the flash loaded right there into the hex editor.
Load eeprom so we can look at the eeprom data and make a change to the actual VIN number and try to write it back.
You can see the VIN number and it ends with 717
Let’s go ahead and change that VIN number 7 to 8 to do a quick test and write it to the ECM.
Let’s change it to 38. That’s the hex equivalent for 8 as you can see we change it to 38 from 37 which reflects in VIN number 718.
Then save the modified eeprom.
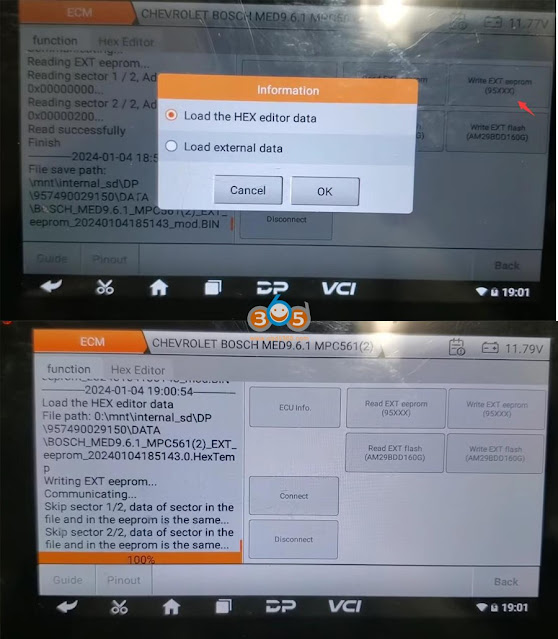
Go to function, Write EXT Eeprom.
We can just use the modified data (load the Hex editor data) we just did in the hex editor. If we didn’t save it you can go to load external data.
It skips two sectors and didn’t write any changes which means it didn’t see any changes.
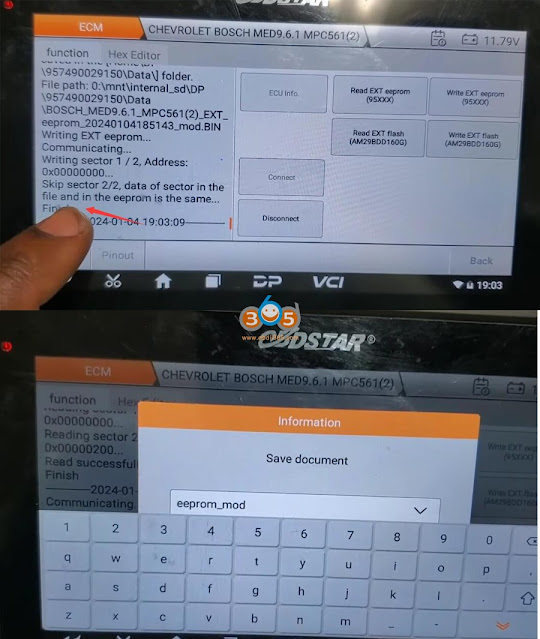
Let’s go back and see the path on the original file.
So what happened was when i did a save but it still has the original file open, so i would have to go to load
if i wanted to do it by the hex editor like what the option we just did.
I would have to pick the actual file (modified eeprom) that just saved.
I could have also alternatively, it would make probably more sense just to load external data to not cause mistake
DC706 did write a change on sector 1 and 2.
Go ahead and read EXT eeprom again and save data
Now we got to the Hex editor. It loaded the modified eeprom we just saved.
We should have our change at VIN number.
The VIN number is changed.
You would then take our donor replacement ECM. Connect it with OBDSTAR DC706, MP001 and P003+ following the
wiring diagram.
Go back to function. Then you would select write flash first.
You would pick load external data and load the flash file that you backed up.
Then it will write it to donor ECM.
Then you would write the eeprom.
Once you write those two files to the donor E69 ECM, you’ve made a clone of this ECM.
You would be able to plug both ECMs into that vehicle and the vehicle should be able to start without any issues.











No comments:
Post a Comment
Note: Only a member of this blog may post a comment.